Points and Paths
All shapes are made up of vector points connected by paths, which make up the outlines of a shape. Vector editing allows you to create new shapes but also modify and polish your vector layers.
Selecting Points
Just like layers, you can select multiple points. Just hold down the Shift key while you click on points. Selected points will appear larger and darker than unselected points. Shift-clicking an already selected point will deselect it. Depending on a point type, its handle control points can also be selected.
Another way to select multiple points is by clicking-and-dragging from outside of a closed shape to make a rectangular selection. Any points that lie within this will be selected.
If you’re clicking-and-dragging to make a selection, holding down the Shift key will invert the selection, meaning already-selected points will deselect within the new selection. Holding down Shift before clicking-and-dragging will extend the current selection.
If your path is open, clicking anywhere in the Canvas will add a new point, so you need to choose the Selection tool by clicking the button next to the Rounding options in the Inspector, (or press X).
It is also worth noting that you can edit multiple vector shapes at once. Select any layer that contains subpaths, or select two or more vector shapes and press the Enter key to begin editing. Vector points will become visible for all shapes where you can make your edits at once, without having to individually select each shape to make your changes.
Pressing the Command-A shortcut will select all the points within a shape, and pressing the Tab key will jump between points in the order they were placed.
Moving Points
With a point selected, you can move it around to modify your shape. A selected point’s properties will appear in the Inspector, giving you its X and Y co-ordinates which can be edited, dragged, or nudged.
When dragging a point around, you may see smart guides appear which allows you to align that point to other points, or the middle of the shape. Holding down the Shift key when dragging a point will ‘lock’ its axis, in the direction you drag it in. This means that after you move a point, it will remain in the exact X, or Y position that it was before. This is also the case for handle control points.
Holding down the Option key will display all handle control points within the shape — any of which can be moved regardless of what point you have selected.
Aligning Points
It is possible to use the distribute and align tools at the top of the Inspector when you have multiple points selected. Distribute will ensure three or more points will be an equal distance from each other, whilst align will make sure two or more points line up.
Rounding Points
Points may often snap to certain places when moving or inserting new points, and this is due to the Rounding option found in the Inspector, under the point type selection. You have the ability to round to full pixel edges, half pixels, or choose not to round at all.
Often, modifying vector points calls for extreme precision, so if you’re zoomed in when adjusting points, enabling the Pixel Grid (View › Canvas › Show Pixel Grid on Zoom) can be useful to see how points may snap.
If inserting new points when zoomed in, you will see a point preview snap to full, or half pixels before placing it, without worrying about being too precise or editing it later.
Modifying Paths
Whilst it is possible to select points, you cannot select paths — but that doesn’t mean they can’t be edited.
When you hover over a path segment (between two points), it will appear blue along with a point preview that follows your cursor. If you click, you will insert a new point: Straight, on a straight line, and Asymmetric if the segment is already curved. If you click and drag to create a new point, the path will curve with an Asymmetric point.
If you hold down the Shift key and click on a path between two points, Sketch will insert the new point exactly in the middle.
You can also directly manipulate a path without inserting additional points. Hold the Command key and hover over a path and the “bend segment” cursor will appear. Holding Command, click and drag the path to begin bending it. This will alter the handle control points on the adjacent points which will influence the path’s curve.
Although not part of the vector editor, the Scissors tool can be used to open a path, and cut away a segment between two vector points.
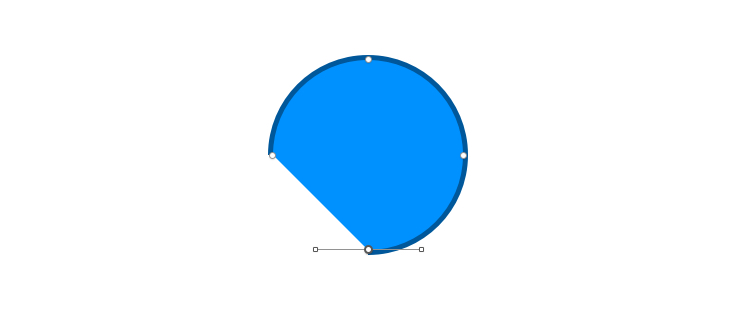
Closed vs Open
A path can be either closed or open. When it is closed, all the paths between the points will be connected. When a path is open, it leaves a gap between the last point and the first. You can turn a closed path to an open one and vice versa by choosing Layer › Path › Close Path in the menu, or Option-Command-O.
You can click the Finish Editing button, or press the Enter key to leave the editing mode to keep your path open. The next time you edit it, you can continue from where you left off and place your next point from either the first or last drawn point.
Depending on your preferences, when editing an open path and clicking on the opposite end point, you can either close the path, or select the point to allow easy editing. You can change this behaviour by choosing Preferences › Layers, and selecting “Close path when clicking to select the opposite end point”.
Note: whenever you’ve applied a fill to your shape, the fill will draw as if the path was closed—even if the border is drawn with a gap.