Inspector
The Inspector on the right lets you adjust the settings for the current layer, or the options for the current tool. When you have a layer selected you will see that the Inspector is divided into sections.
Alignment Options
In a bar at the very top of the Inspector are buttons for aligning and distributing layers. These buttons will become active when you have more than one layer selected. More information about this feature can be found under Moving Layers.

Layer Properties
The layer properties are visible in the top part of the Inspector; the position, size, opacity, blending, and (depending on the layer type) a few special options, like corner radius for a rectangle or the number of points for a polygon shape.

Resizing Constraints
This is something that you’ll only see if you have a layer selected inside a group or Artboard, and it allows you to determine how that layer should behave when the group or Artboard it’s in is resized. To learn more about this feature, check out the Resizing Constraints chapter.

Text Fields
The text fields in the Inspector aren’t ordinary text fields. If you hover your pointer over them you will see little up and down arrows appear on the right-hand size of the text field. You can click those to quickly increment or decrement the value. If you hold the Shift key, Sketch will instead increment or decrement the value by 10 times as much. Holding down the Option key will increase/decrease it by a tenth of that size.

Up and Down
Once you are editing the text fields directly, the up and down arrows will have disappeared, but their functionality is still available. You can use the up an down arrow keys in combination with the Shift key to change the value by 10.
Math
Another great feature in our text fields is that you can perform math operations in all numerical inputs of the Inspector. You can add, subtract, divide, multiply, and in some cases, use percentage to adjust your objects, as shown below. For example, you can select a layer and use +, –, *, or / in any of the numerical fields.
In the radius input field for rectangles, you can specify a different value for each corner by using ; (eg. 40;0;40;0).
You can specify a percentage in the height or width values of an object if it is contained inside a group or Artboard. Sketch will calculate the value and resize the layer. (eg, giving a layer’s width value “10%” when its in a 960 px-wide Artboard will change its width to 96 px).
Scrubbing Values
For quickly adjusting text field values you can click-and-drag on the label under any text field to quickly increase or decrease its value. If you’re not sure about the exact value you want but just want to see its effect on the Canvas, this is great way for quick experimentation.
Layer Styles
The Fills, Borders, Shadows, and Blur style attributes that can be applied to layers each have their own sections.
To add a new style attribute to a layer, just click the add button ![]() in the desired section title:
in the desired section title:

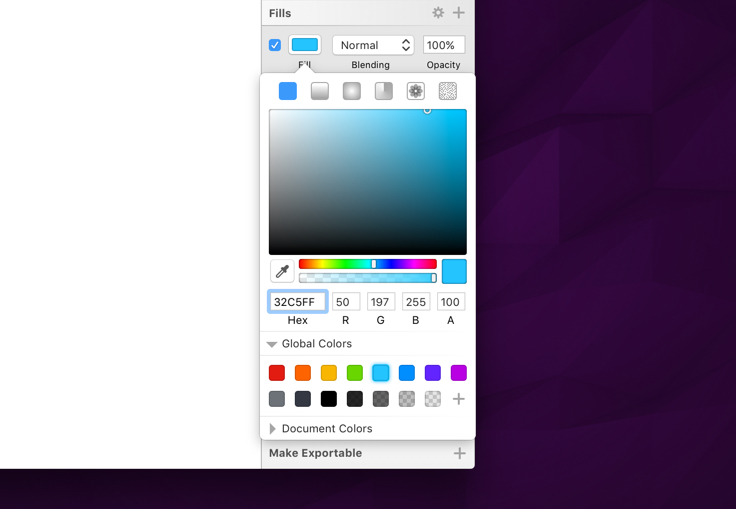
When adding a new Fill, Border, or Shadow, you’ll get a popover where you can select its color:
You can hide each attribute by deselecting the visibility checkbox on its left. When one or more Fills, Borders or Shadows are deselected, you can remove them by clicking on the delete button ![]() that appears on the section title:
that appears on the section title:

You can apply a Blur much the same way, by selecting the visibility checkbox in the section title. You can then choose the type of blur being applied to your layer from the pop-up menu, and adjust its blur radius.
Exporting
In the bottom-left of the Inspector, you will find the Make Exportable option. From here, you can make any layer or group ready for export by pressing the add button ![]() . You can learn more about the different exporting options here.
. You can learn more about the different exporting options here.