Export Presets
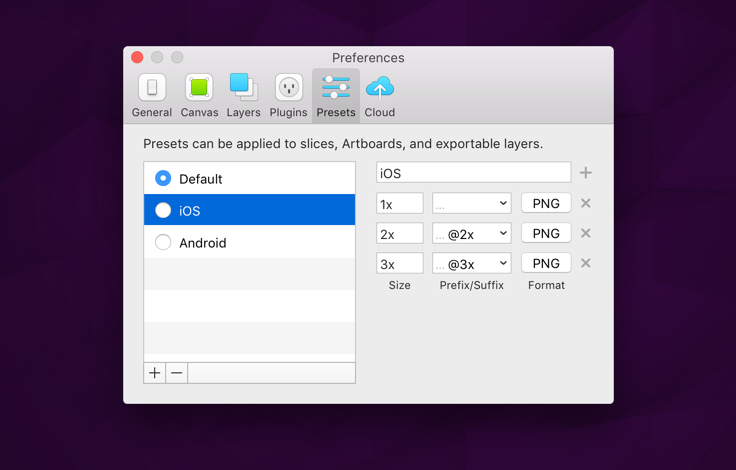
Export presets are an incredibly useful feature, that can save you time when it comes to exporting assets from your designs. Presets can be managed and created in the Presets preference pane.
In the preferences, there is a list on the left-side of the view that contains all your presets, which can be accessed from the bottom of the Inspector when an exportable layer, slice, or Artboard is selected. The radio button that appears left to the preset’s name allows you to select which of these presets should be the default one that appears whenever a new slice has been inserted, or a layer has been marked as exportable.
New presets can be added by clicking the add button at the bottom of the list, whilst the remove button will remove the selected preset.

To the right, is where all of the export scales that make up your preset live. Clicking the add button will add a new export scale, whose size, prefix/suffix, and filetype can be modified. There’s no limit to how many scales can be added to a preset, and presets can contain both scales with prefixes and suffixes. You can learn more about these export settings individually on the Make Exportable chapter of the documentation.
